Create a new campaign
The process of creating a new campaign consists of 5 steps, described in this article.
In this section
| Steps to create a new campaign
|
Steps to create a new campaign
The creation of a new campaign is a simple process. First of all:
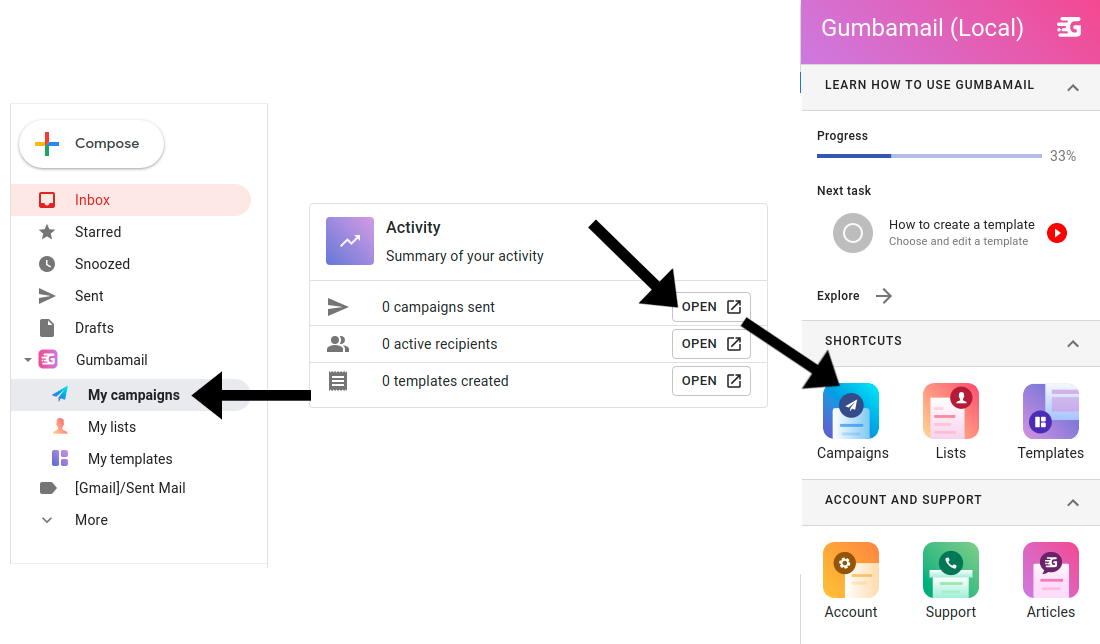
- Go to the CAMPAIGNS view. It is accessible from the sidebar, the main navigation menu, and from the ACCOUNT view.
- Click the NEW CAMPAIGN button.

Step 1: Configure the shipping
A short form related to the shipping settings should be filled. The information required is:
- Campaign name: This is the internal name set to identify the campaign.
- Sender email: This is the email address on behalf of who the campaign is sent.
- Sender name: This is the name on behalf of who the campaign is sent. This is your public name, visible to the recipients.
- The subject of the campaign: This is the text to be included as the subject of each email sent.
Once the information is set, click the NEXT button to validate the form and to continue to the next step.

Verify sender email
It is possible to set the same email address with which you are logged in to Gmail as the sender email. But it is not the only option. We can choose a different email address.
The only limitation when choosing an email address is that you own it. So, in case you enter a different email address (never used before), these extra steps are required:
- When you click the NEXT button, the new email address is detected. Then, a new VERIFY button appears, close to the sender email field. Click on this button.
- In order to check that you have access to the specified email address, an email with a verification code is sent to this email address. Once you enter the received code in the popup, you will be able to continue to the next step.


This way, the new email address is attached to your account and you have the possibility to send your campaigns using this email address as a sender email.
| ⚠️ TO CONSIDER: The chosen email address will have an impact on email deliverability. It is recommended not to use your Gmail email address but one email address of a domain of your own. |
Step 2: Choose recipients
It is time to decide who will receive the campaign. You have the possibility to select one or more of your recipient lists.

Once you have chosen all the recipient lists, click the NEXT button to proceed.
| ⚠️ TO CONSIDER: If you choose a list with the status In progress and you send the campaign immediately, the campaign will be received only for those recipients already included in the list at shipping time. |
Step 3: Choose a template
Choose the contents to be sent by selecting one of your custom templates. Once you select one template, its content will be loaded in the editor.

Step 4: Design the contents
If your template is ready to be sent, you can skip this step. Otherwise, you have the possibility to apply specific changes to the selected template. These changes will be tied to this campaign (not to the template itself).
Personalization with mail merge
In case that the selected recipient list contains specific tags for each recipient (apart from the email) you will be able to apply mail merge. To do so:
- Click on a text component inside the editor.
- Click the MERGE TAGS button.
- Select the tag you want to insert there (among the ones imported previously while creating the list).
- That is all! At shipping time, the tags found will be replaced by the corresponding value associated with each specific recipient.

| ⚠️ TO CONSIDER: If you have chosen more than one recipient list, only the coincident merge tags will be shown. |
Step 5: Check the summary
Once the shipping information is set, the recipients have been chosen and the email content is ready, the campaign configuration is complete. The last step allows you to do a final check before send or schedule the campaign.

Check and test (1 and 2)
There are two check actions available:
- You can go back to the previous steps to edit the configuration. You will find a direct link to each step in the corresponding EDIT button.
- Before finishing the campaign, you can send a test email to yourself by clicking the SEND TEST button. This way you can check the final result before sending the campaign. You can specify to which email address the email should be sent.

| ⚠️ WATCH OUT: If a different list of recipients or a different template is selected after changing the email content in the editor, these changes are lost (as the editor content is reloaded). |
Schedule campaign (3)
You have the possibility to send the campaign in the future. You only have to click the SCHEDULE button and specify the desired date and time.

After you schedule the campaign, you will be redirected to the CAMPAIGNS view.
Send campaign (4)
If you want to send the campaign immediately at creation time, click the SEND button. After a confirmation popup, the shipping will be initiated.

After you send the campaign, you will be redirected to the CAMPAIGNS view.
| ⏭️ NEXT: You can find detailed information about how to monitor your campaign here. |